Itadaki Street DS
| Itadaki Street DS | |||
|---|---|---|---|
 For alternate box art, see the related gallery. | |||
| Developers | TOSE Software Co. Think Garage | ||
| Publisher | Square Enix | ||
| Platform | Nintendo DS | ||
| Release date |  June 21, 2007[1] June 21, 2007[1] | ||
| Language | Japanese | ||
| Genre | Party | ||
| Rating |
| ||
| Modes | Single player, multiplayer (up to four players) | ||
| Format |
 Game Card Game Card | ||
| Input | |||
| Serial code | NTR-AEEJ-JPN | ||
 - All ages
Itadaki Street DS[2] is a Japanese-only game for the Nintendo DS developed by TOSE and Think Garage, and published by Square Enix. It is the seventh entry in the Monopoly-like Itadaki Street series and the first game since Itadaki Street 2: Neon Sign wa Bara Iro ni for the Super Famicom to be released on a Nintendo console. It features characters and elements from both the Super Mario franchise and Dragon Quest series.
A follow-up to this game, titled Fortune Street, was released internationally for the Wii in December 2011.
Gameplay[edit]
Players move around the board, buying shops and collecting money from others who land on their shop squares. Depending on circumstances, some players can forcibly take over another player's shop squares, or make them inactive for a turn. Players can also hold shares of an area of squares so that they get paid when someone lands on any square in that block, even if it is not their own.
Players get bonuses for leveling up, which is done by passing four special squares on the board (each marked with a suit- Club, Diamond, Heart, and Spade) and then going to the bank square. If the player lands on one of these special squares instead of passing them, they get a chance to randomly draw a "chance card", which affects gameplay or a player. Usually, the goal is to reach a certain total property value and get to the bank, or to make a player bankrupt. There is also a special casino square where themed games of chance occur.
Squares[edit]
- Shop square: The player can use their money to buy it. If this shop is owned by somebody else, the player must pay its price. If this shop is already owned by the one that lands on it, they can invest money in one of their shops.
- Lucky square: The player gets a quarter of all the fees for one turn.
- Super lucky square: The player gets the half of all the fees for one turn.
- Vacant plot: The player can build anything on it.
- Casino square: The player can play a minigame and win some money, stocks or suits.
- Break square: All the player's shops get closed for a turn.
- Suit square: The player gets a suit and chooses a chance card if they land on it.
- Chance square: The player chooses a chance card.
- Cannon square: The player goes to the chosen opponent's location.
- Warp square (Either a Warp Pipe or a Portal): The player warps to the Warp Square of the same color.
- Switch square: The Board's shape changes.
- Magmalice Square: If the square is active, the player goes to an inactive Magmalice Square and then it becomes inactive. It only appears in Mt. Magmageddon.
- Suit change square: The suit offered by the square is not fixed; it changes as players pass by it.
- Die square: The player rolls another die.
- Bank square: All players start and end on this square. When a player passes by this square, they may buy stocks. If the player brings the four suits to the bank, they get a salary and their level increases by one. When they have the goal assets, they have to go to the bank in order to win.
- Broker square: The player may buy stocks.
Areas and stock system[edit]
All shops are divided in many areas, each given a unique name and color. Most areas contain four shops. Shops start with a given price when players buy them and by investing into them, the price increases. The player can invest up to 999 gold into a shop at a time, but this amount is limited by the shop's max capital. If a player gets another shop in the same area as other shops owned by them, the shops' prices grow, and the player can invest more money on that shop. The player can achieve a monopoly by owning all shops in the area. Shops in monopolized areas have their value boosted and accept even bigger investments. The appearance of a shop changes based on how much gold is invested in it, though this is only cosmetic.
A player who crosses onto the bank square or stops on a broker square may buy stocks. The player can choose any area to invest gold into. Players may buy up to 99 stocks at a time and can hold a max number of 999 stocks in an area. Whenever gold is exchanged between players by landing on a shop, stockholders in that area get a bonus percentage of gold based on how many stocks they have. When gold is invested in a shop, the area's stock price may get raised and make stocks more valuable. When a shop loses value, the stock price may go down. Likewise, when a player buys or sells more than 10 stocks in an area, the price of stock in that area goes up or down by 8%, respectively. Players can sell their stocks at the start of their turn.
Players can exchange shops before rolling the die. They can choose to exchange one to two of their own shops for one to two of an opponent's shop. Gold can be added as a supplement to the deal. After the initial terms of the trade are decided, the opponent may ask for more gold, accept the terms of the deal, or decline the trade. Players may also force buyout on the opponents' shops when they land on them. To buy a shop out, the player must pay 5x its real value.
Each CPU rank invests differently:
| CPU Rank | Max. stock buying per bank pass | Max. investment per invest | Chance of buyout for others | Other notes |
|---|---|---|---|---|
| Rank D | 29 | 100G | Very rarely | None |
| Rank C | 49 | 200G | ? | None |
| Rank B | Maximum | Maximum | Often | They usually invest too early, preventing them from buying stocks in their areas. |
| Rank A | Maximum | Maximum | Often | They invest later than Rank B CPUs, letting them buy more stocks before raising their price. They also try to buy stocks in opponents' areas. |
| Rank S | Maximum | Maximum | Often | They sometimes sell stock to lower opponents' assets. |
Vacant plots[edit]
There are special squares with a "Sale" sign on them. On those squares, the player can build one of the following:
- Gate: It starts with a price of 10G, and when somebody passes by it, that player has to pay the price of the Gate and it increases by 10G. Platypunk, Slime, Birdo, Donkey Kong, Dragonlord and Bowser often build it.
- Circus Tent: The tent price starts being 100G, and if the owner lands on it they may increase it to 500G, 1000G, and finally, 2000G. The player has to pay 100G for each investment and the Circus Tent's value also increases by 100G. Luigi, Daisy, Toad and Yangus often build it.
- Balloon Landing: The owner can fly anywhere when they land on it. Other players have to pay 10% of the owner's salary. Mario, Bianca, Alena, Peach and Yoshi often build it.
- Shrine: The owner can get a 5% bonus on all their assets if they land on it. Other players have to pay 10% of all their assets, making it one of the most expensive buildings. But it can be easily bought out with 1000G, which is a small amount of money in the late stages of the game. Pudding, Kiryl, Jessica and Angelo often build it.
- Bar: The owner can invite everybody to a party in the bar, which means that everybody must warp to the Bar square. If other players land on it, they must give the owner a "gift" of 30GxLVL. Wario, Waluigi and Hassan often build it.
- Real Estate Agency: The owner can buy any ownerless shop. If other players land on it, they must "sleep" and their shops close for a turn. It is the least used building in all the game and the AI buys it very rarely.
- Wood Shop: It acts like a normal shop. But since it is worth 1000G, when it is built, the stock price of the area where it was built rises significantly. B, A and S-Ranked characters may use this strategy.
The Wood Shop costs 1000G to build while the other building types cost 200G. Only three of each buildings can exist on the board at the same time. Players can renovate a vacant plot at the start of their turn for a fee of 150G.
Characters[edit]
There are 23 playable characters in Itadaki Street DS: Eleven from the Super Mario franchise and eleven from the Dragon Quest series. Players create and customize their own characters that they play as. Although only four of the characters from both series are playable to begin with, the others can be unlocked by playing through the Tour mode of the game. Additionally, there are also three support/guest characters that players can summon with the help of a card, but are not playable.
Depending on a character's rank, they reward a set number of coins if the player is able to beat them on a board.
- Rank D: 10 coins
- Rank C: 15 coins
- Rank B: 20 coins
- Rank A: 25 coins
- Rank S: 30 coins
Super Mario franchise[edit]
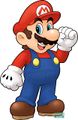 Mario (Rank A)
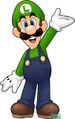 Luigi* (Rank C)
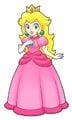 Princess Peach (Rank S)
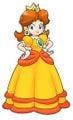 Princess Daisy* (Rank C)
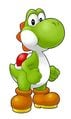 Yoshi (Rank B)
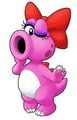 Birdo* (Rank D)
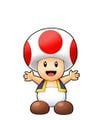 Toad (Rank C)
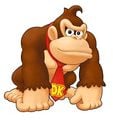 Donkey Kong* (Rank D)
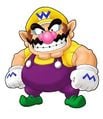 Wario* (Rank B)
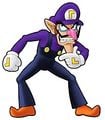 Waluigi* (Rank C)
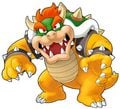 Bowser* (Rank A)


Dragon Quest series[edit]
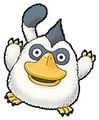 Platypunk* (Rank C)
 Slime (Rank D)
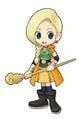 Bianca* (Rank B)
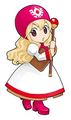 Pudding (Rank C)
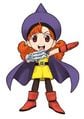 Alena* (Rank B)
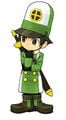 Kiryl (Rank C)
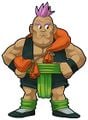 Hassan* (Rank C)
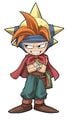 Yangus (Rank D)
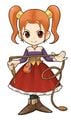 Jessica* (Rank S)
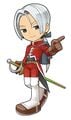 Angelo* (Rank A)
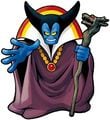 Dragonlord* (Rank S)


Other[edit]
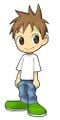 Boy
Boy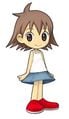 Girl
Girl


* - Unlockable characters.
Support/Guest Characters[edit]
- Lakitu (closes shops he passes or lands on for one turn)
- Healslime (gives suits necessary for leveling up when player passes it)
- Dancing Jewels (pays out to the owner of any square it lands on)
Boards[edit]
There are 14 playable boards in this game.
Super Mario boards[edit]


Dragon Quest boards[edit]


Tour mode[edit]
In order to use characters and boards in Free Play mode, the player has to unlock them in Tour mode. Some player cosmetics are also exclusively found in this mode. Each time a tour is completed, the player is awarded with its corresponding cosmetics which allows the player to gain multiple of the same cosmetics. Beating all of the boards unlocks a sound test.
| Name | Description | Board | Opponents | Difficulty | Rewards |
|---|---|---|---|---|---|
| トロデーンで遊んでーんツアー (Trodain Fun Tour) |
初めての人でも遊びやすいコースです。対戦相手はよわくマップを1つクリアするだけです。クリア条件もひくめです。 | Castle Trodain | Slime Toad Platypunk |
★ | Slime mask Slime suit |
| ヨッシーのワクワクおさんぽツアー (Yoshi's Exciting Walking Tour) |
このゲームに少しなれた人が チャレンジしやすいコースです。対戦相手はやや手ごわいですがマップを1つクリアするだけです。クリア条件もひくめです。 | Yoshi's Island | Yoshi Yangus Luigi |
★★ | Luigi Yoshi hat Yoshi suit |
| ドキドキ! ホラーアドベンチャーツアー (Heart-pounding! Horror Adventure Tour) |
ドラゴンクエストのマップを集めたコースです。対戦相手はやや手ごわくマップを2つクリアする必要があります。クリア条件はやや高めです。 | Ghost Ship | Platypunk Yangus Donkey Kong |
★★★ | — |
| Colossus | Platypunk Kiryl Alena |
Colossus Platypunk Toughie mask Toughie outfit | |||
| 兄さんとの思い出キノコ王国一周 ツアー (Memories of my Brother: Around the Mushroom Kingdom Tour) |
マリオシリーズのマップを集めたコースです。対戦相手はやや手ごわくマップを2つクリアする必要があります。クリア条件はやや高めです。 | Mario Circuit | Luigi Slime Birdo |
★★★ | Birdo |
| Peach's Castle | Luigi Pudding Wario |
Peach's Castle Wario Shy Guy mask Shy Guy clothes | |||
| メロメロ! 美人だらけのいたストツアー (Lovely! Beautiful Women of Itadaki Street Tour) |
ドラゴンクエストのマップを集めたコースです。対戦相手は手ごわくマップを2つクリアする必要があります。クリア条件は高めです。 | Mt. Magmageddon | Alena Birdo Daisy |
★★★★ | Mt. Magmageddon Daisy |
| Slimenia | Alena Pudding Bianca |
Slimenia Bianca Bunny ear band Bunny suit | |||
| 大天才! ワリオ様の パワフルいただきツアー (Great Genius! Lord Wario's Powerful Top Tour) |
マリオシリーズのマップを集めたコースです。対戦相手は手ごわくマップを2つクリアする必要があります。クリア条件は高めです。 | Mario Stadium | Wario Donkey Kong Carver |
★★★★ | Mario Stadium Carver |
| Delfino Plaza | Wario Yoshi Waluigi |
Delfino Plaza Waluigi Bill Blaster hat Bullet Bill body | |||
| いっしょにたんけん! お宝はっつツアー (Let's Explore Together! Treasure Hunting Tour) |
ドラゴンクエストのマップを集めたコースです。対戦相手はかなり手ごわくマップを2つクリアする必要があります。クリア条件は優勝です。 | Castle Trodain | Bianca Daisy Carver |
★★★★★ | — |
| Robbin' Hood Ruins | Bianca Yoshi Angelo |
Robbin' Hood Ruins Angelo Morrie Hair Morrie's Clothes | |||
| ふたたびぼうけんへ! 伝説のヒーローツアー (Return to Adventure! Legendary Hero Tour) | マリオシリーズのマップを集めたコースです。対戦相手はかなり手ごわくマップを2つクリアする必要があります。クリア条件は優勝です。 | Yoshi's Island | Mario Toad Kiryl |
★★★★★ | — |
| Super Mario Bros. | Mario Waluigi Jessica |
Super Mario Bros. Jessica Piranha Plant hat Pipe suit | |||
| いざ伝説の地へ...ロトの勇者たいけんツアー (Let's go to the Land of Legends... Erdrick's Hero Experience Tour) | 伝説の地 アレフガルドのコースです。対戦相手も ツワモノばかりそろっています。クリア条件は優勝です。 | Alefgard | Angelo Mario Dragonlord |
★★★★★★ | Alefgard Dragonlord Erdrick's helmet Erdrick's armor |
| 決戦クッパ城! いたスト王座決定戦 (Battle at Bowser's Castle! Itadaki Street Championship Match) | 最後はクッパ城のコースです。対戦相手も最強クラスのメンバーばかりそろっています。クリア条件は優勝です。 | Bowser's Castle | Peach Jessica Bowser |
★★★★★★★ | Bowser's Castle Bowser Bowser cap Bowser suit |
Minigames[edit]
When a player lands on casino square that player gets to play a game of chance. There are four of them:
- Itadaki Slot: The player starts a slot machine and stops the reels. In order to win prizes, the player needs to line up the pictures on the reels.
- Amida Dokan: This game takes place in the Warp Zone from Super Mario Bros. The player must choose one of the three pipes that interconnect partway through. The prize the player receives depends on which pipe Mario exits from.
- Gin no Tarot: The player is given some concealed Tarot cards, and they must choose two. The first card decides who is going to be affected, and the second card decides the event.
- Monster Colosseum: A list of four Dragon Quest monsters appear, and the players must choose one of them. After the monsters are chosen, they fight and the owner of the last monster alive wins some Gold.
Chance Cards[edit]
This is a translated list of Chance Cards that can be found upon landing on a Suit Square or Chance Square.
| # | Image | Description | Notes | Image origin |
|---|---|---|---|---|
| 01 |  |
You may change direction! | - | World 1-1 from Super Mario Bros. |
| 02 |  |
B-Dash! Roll again! | - | Yoshi's Island 2 from Super Mario World |
| 03 |  |
Warp to any square except a chance square! | - | Star World from Super Mario World |
| 04 |  |
You must give 100g to a rival of your choice! | - | Dragon Quest VIII: Journey of the Cursed King |
| 05 |  |
Warp to a lot of your choice! | - | "Welcome to Isle Delfino" from Super Mario Sunshine |
| 06 |  |
Warp to a chance square of your choice! | - | World 4-2 from Super Mario Bros. |
| 07 |  |
The value of all your lots increases by 7%! | - | World 1-1 from Super Mario Bros. |
| 08 |  |
Rent on all owned lots is increased by 30% until the owner's next turn! Roll again! | - | Dragon Quest VIII: Journey of the Cursed King |
| 09 |  |
All shops close until the owner's next turn! Roll again! | - | Legerdeman's sprite from Dragon Quest |
| 10 |  |
Rent on all owned lots is decreased by 50% until the owner's next turn! Roll again! | - | Forest of Illusion 4 from Super Mario World |
| 11 |  |
Steals gold equal to 11 times the result of the dice roll from all your rivals! | - | Treasure Ship from Super Mario Bros. 3 |
| 12 |  |
You may invest one of your lots! | - | Dragon Quest: Shōnen Yangus to Fushigi no Dungeon |
| 13 |  |
The value of all your lots decreases by 13%! | - | Moonbrooke being attacked by Hargon's forces from the Super Famicom version of Dragon Quest II: Luminaries of the Legendary Line |
| 14 |  |
You must give all rivals 30g! | - | "Mario on Trial" from Super Mario Sunshine |
| 15 |  |
You will receive gold equal to 50 times the result of the dice roll! | - | World 3-1 from Super Mario Bros. |
| 16 |  |
A roulette is spun three times, whichever streets the wheel stops on will have its lots increase by 10%! | - | World 3-1 from Super Mario Bros. |
| 17 |  |
You get half your level up bonus! | Dictated by current level | World 8-4 from Super Mario Bros. |
| 18 |  |
You must sell a house back to the bank, but you get twice its value! | - | Dragon Quest VII: Fragments of the Forgotten Past |
| 19 |  |
Rent of your lots is increased by 30% until your next turn! | - | Dragon Quest III: The Seeds of Salvation |
| 20 |  |
Increases the Worth of any owned lot of your choice by 20%! | - | World 1-1 from Super Mario Bros. |
| 21 |  |
A roulette is spun, you get 20 shares in whichever street the wheel stops on! | - | Top Secret Area from Super Mario World |
| 22 |  |
You may sell a square back to the bank for twice its value! | - | World 3-5 from Super Mario Bros. 3 |
| 23 |  |
Increases the Worth of any owned lot of your choice by 50%! | - | World 1-1 from New Super Mario Bros. |
| 24 |  |
You must sell a house back to the bank, but you get 200g + its value! | - | The beginning of Paper Mario |
| 25 |  |
Rent of all your lots is halved until your next turn! | - | A castle course from Super Mario Bros. |
| 26 |  |
You will receive a share of any rent paid until your next turn! | Same effect as the lucky square | "Mario on Trial" from Super Mario Sunshine |
| 27 |  |
You will receive 27 gold for every square you own! | - | Tantegel from the Family Computer version of Dragon Quest |
| 28 |  |
Summons Dancing Jewels! | - | Goodybag's sprite from Dragon Quest III: The Seeds of Salvation |
| 29 |  |
You must warp to a rival of your choice! | - | Dragon Quest II: Luminaries of the Legendary Line |
| 30 |  |
Rent on all owned lots is set to 100g until the owner's next turn! Roll again! | - | Yoshi Island 2 from Super Mario World |
| 31 |  |
A roulette is spun, whichever street the wheel stops on will have its lots increased by 10%! | - | A Liquid metal slime in the Hall of Hargon from the Super Famicom version of Dragon Quest II: Luminaries of the Legendary Line |
| 32 |  |
A roulette is spun, whichever street the wheel stops on will have its lots increased by 20%! | - | Two Liquid metal slimes in the Hall of Hargon from the Super Famicom version of Dragon Quest II: Luminaries of the Legendary Line |
| 33 |  |
You may sell a square back to the bank for triple its value! | - | Mario Kart DS |
| 34 |  |
Sweetbreathed! All your lots will close for one turn! | - | Funghoul's sprite from Dragon Quest III: The Seeds of Salvation |
| 35 |  |
You may sell any number of shares owned in one block back to the bank for 35% more! | - | The Alchemy Pot from Dragon Quest VIII: Journey of the Cursed King |
| 36 |  |
You may pay 100g to invest in one of your lots! | - | The island containing Yggdrasil from Dragon Quest II: Luminaries of the Legendary Line |
| 37 |  |
A roulette is spun, whichever street the wheel stops on will have its lots increased by 30%! | - | Three Liquid metal slimes in the Hall of Hargon from the Super Famicom version of Dragon Quest II: Luminaries of the Legendary Line |
| 38 |  |
You may buy stock... but it will cost 10% more! | - | Make Eggs, Throw Eggs from Super Mario World 2: Yoshi's Island |
| 39 |  |
You must give 50g to a rival of your choice! | - | Slime MoriMori Dragon Quest: Shougeki no Shippo Dan |
| 40 |  |
A roulette is spun, whichever street the wheel stops on will have its lots decreased by 20%! | - | World 6-2 from New Super Mario Bros. |
| 41 |  |
A roulette is spun, whichever street the wheel stops on will have its stock decrease by 10%! | - |